


Flooding can happen in an instant, whether from a storm, a burst pipe, or an overflowing appliance. The damage is overwhelming, and it’s easy to feel paralyzed by what to do first. Having a clear emergency flood cleanup checklist helps you stay safe, minimize damage, and take the right steps before professional help arrives.
Step 1: Ensure Safety First
Flooded homes can be dangerous. Turn off the electricity to the affected area if it is safe to do so. Avoid walking through standing water, especially if electrical outlets, wiring, or appliances are submerged. Contaminated water can also cause illness, so keep children and pets away until the area has been cleared by professionals.
Step 2: Stop the Source of Water
If the flooding is caused by a broken pipe or appliance, shut off your home’s main water supply. For storm-related flooding, check if your sump pump is working. If the cause is a sewer backup, avoid using sinks, toilets, or showers until the issue is resolved. Stopping the water source is critical for preventing further damage.
Step 3: Document the Damage
Before moving or cleaning anything, take photos and videos of the damage. Capture images of walls, flooring, furniture, and any affected belongings. This documentation will be invaluable for your insurance claim. Don’t throw anything away until your insurance adjuster has had a chance to review the damage.
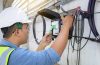
Step 4: Call a Professional Flood Cleanup Team
Professional restoration companies have the training and equipment to handle flood cleanup safely and effectively. They’ll extract water, disinfect contaminated areas, and use industrial drying equipment to prevent mold growth. The sooner you call, the better your chances of saving structural materials and personal belongings.
“Homeowners who act quickly and call professionals right away always come out ahead,” says Eric Daniels of Water Damage Restoration Pros. “We can save more, restore faster, and prevent mold from becoming a much bigger problem.”
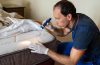
Step 5: Protect Your Belongings
If it’s safe, move undamaged items out of the flooded area. Elevate furniture, electronics, and valuables to prevent further damage. Keep in mind that porous materials like carpet, cardboard boxes, and upholstered furniture often cannot be saved if they’ve been contaminated with floodwater. Non-porous items like glass, metal, or plastic can usually be cleaned and disinfected.
Step 6: Begin Ventilation and Drying
Open windows and doors if weather permits, and use fans to increase airflow. This won’t replace professional drying, but it can help reduce humidity while waiting for the restoration team. Quick drying is critical for preventing mold, which can begin to grow within 24–48 hours of flooding.
Step 7: Contact Your Insurance Company
Notify your insurance provider as soon as possible. Provide photos, videos, and any receipts for damaged property. Many policies require immediate reporting, and some may not cover damages if you delay. Professional restoration companies often help with documentation to make the claims process smoother.
Step 8: Stay Out Until It’s Safe
After flood cleanup begins, avoid spending unnecessary time in the affected areas. Professionals may use drying equipment, disinfectants, and air scrubbers that require safety precautions. Once cleanup and restoration are complete, the property will be safe for re-entry.
Peace of Mind in a Checklist
Flooding is stressful, but having a clear checklist keeps you focused and safe. Prioritizing safety, stopping the water source, documenting damage, and calling professionals immediately are the most important steps. With the right approach, you can reduce damage, speed up recovery, and get back to normal sooner.


